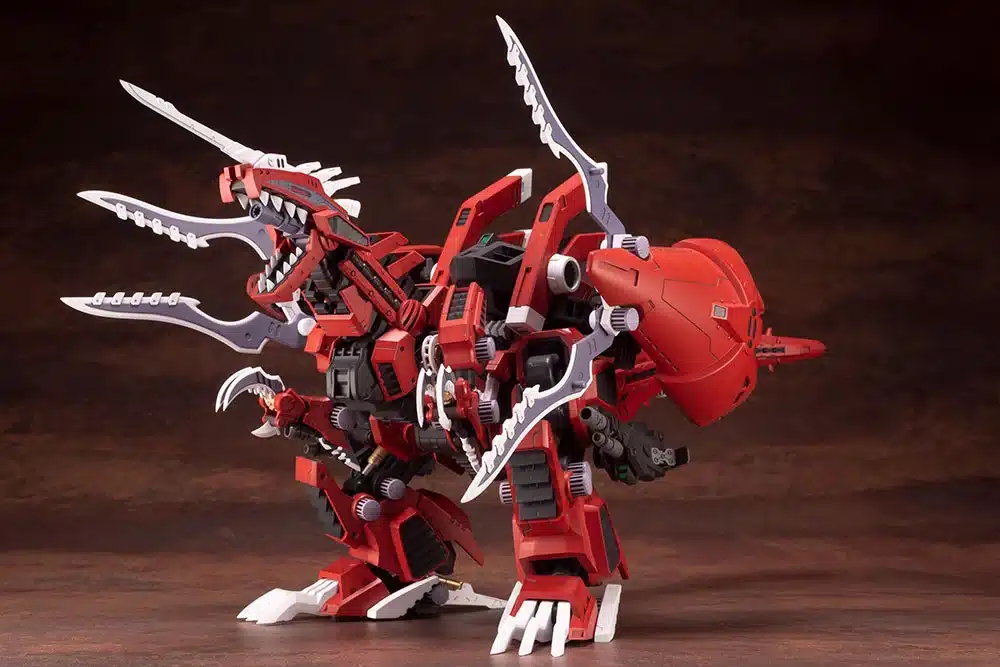
Do you ever watch anime and think to yourself, “I want to be part of that world?” With Zoids model kits, you can!
Zoids are a type of mecha that appear in anime and manga. They’re usually used for battle, and their pilots are known as Alv pilots. Building your own Zoid is the perfect way to enter the anime world and experience it firsthand.
In this guide, we’ll teach you all about Zoids model kits. We’ll discuss the history of Zoids, the different types of kits available, and some of the best kits out there. We’ll also provide some tips for assembling and painting your Zoid models.
What are Zoid Model Kits?
Zoids model kits are a popular hobbyist’s dream come true. These kits allow enthusiasts to build and customize their very own mechanized creatures known as Zoids. Zoids are fictional, animal-shaped robots that have captured the hearts of fans around the world. Each Zoids model kit comes with a set of parts that can be assembled to create a unique Zoid, complete with moving joints and intricate details.
Types of Zoid Model Kits
There are various types of Zoids model kits available, catering to different skill levels and preferences. Some kits are designed for beginners and feature simpler designs, while others target more experienced builders with complex and highly articulated Zoids. From dinosaur-like Zoids to massive mecha beasts, there is a wide range of options to choose from, offering something for everyone’s taste.
For enthusiasts who enjoy the challenge of building and painting their Zoids, there are also unpainted kits available. These kits provide a blank canvas for customization, allowing builders to bring their creative visions to life.
When it comes to Zoids model kits, the possibilities are endless. Whether you’re a beginner looking to start your Zoids journey or an experienced builder seeking a new project, there’s a kit out there waiting for you to conquer.
History of Zoid Model Kits
The origins of the Zoids franchise can be traced back to the early 1980s when Takara, a Japanese toy company, first introduced the concept of robotic animal model kits. These kits, known as Zoids, quickly gained popularity among both children and adult collectors.
The timeline of Zoids model kits showcases the evolution of the franchise. In 1983, the first Zoids model kits were released, featuring simple and mechanical designs. Over the years, the complexity and intricacy of the Zoids models increased, incorporating more detailed parts, articulation, and electronic features.
In the early 2000s, TOMY, another Japanese toy company, obtained the rights to produce Zoids model kits and introduced a new generation of designs. These revamped Zoids featured sleeker aesthetics and innovative motorized mechanisms that brought the models to life with moving parts and sound effects.
In recent years, Zoids model kits have experienced a resurgence in popularity, appealing to both nostalgic fans and newcomers to the franchise. Various limited-edition releases and collaborations have added to the allure of collecting Zoids, making it a thriving community for enthusiasts around the world.
Key takeaway: The history of Zoids model kits spans several decades, showcasing their evolution from simple robotic animal models to intricate, highly detailed and motorized collectibles that continue to captivate fans today.
How to Assemble Zoid Model Kits
Assembling Zoids model kits is an exciting and creative process that allows you to bring these fantastic mechanical creatures to life. Whether you’re new to the world of Zoids or a seasoned modeler, here’s a step-by-step guide to help you assemble your Zoids model kit with precision and skill.
1. Gather your tools: Before you begin assembling your Zoids model kit, make sure you have all the necessary tools and materials on hand. This includes clippers for removing the parts from the sprues, a hobby knife for cleaning up any excess plastic, sandpaper or a file for smoothing rough edges, and a quality plastic cement for bonding the parts together.
2. Read the instructions: Each Zoids model kit comes with a detailed instruction manual that provides step-by-step guidance on how to assemble the model. Take the time to read through the instructions thoroughly before you start, familiarizing yourself with each component and the order in which they should be assembled.
3. Prepare the parts: Carefully remove the parts from the sprues using clippers, taking care not to damage or break any delicate pieces. Use a hobby knife to remove any excess plastic or flash from the parts, ensuring a clean and precise fit. Smooth any rough edges with sandpaper or a file for a professional finish.
4. Begin assembly: Start by identifying the larger components and attaching them together according to the instructions. This usually involves slotting the parts together or using plastic cement to bond them securely. Take your time and make sure each piece is aligned correctly before moving on to the next step.
5. Build the inner frame: Zoids model kits often feature an inner frame that serves as the skeleton of the model. Follow the instructions to assemble the inner frame, paying attention to any movable joints or articulation points. This will give your Zoid a realistic range of motion once it’s completed.
6. Attach the armor: Once the inner frame is assembled, it’s time to attach the armor pieces. Carefully snap or glue each piece into place, ensuring a tight fit that looks seamless. Take your time with this step, as it’s crucial for achieving a polished and professional-looking final result.
7. Add the finishing touches: After the main components are assembled, it’s time to add the smaller details and accessories. This can include weapons, decals, stickers, or any customizations you desire to personalize your Zoids model. Follow the instructions to attach these
Common Mistakes When Assembling Zoid Model Kits
When it comes to assembling Zoids model kits, there are a few common mistakes that beginners often make. By being aware of these mistakes, you can avoid them and ensure a smooth and enjoyable building process.
1. Rushing Through the Instructions: Zoids model kits come with step-by-step instructions that guide you through the assembly process. However, one common mistake is to rush through these instructions, leading to confusion and potential errors. Take the time to carefully read and understand each step before proceeding.
2. Skipping the Cleaning Process: Before starting the assembly, it is important to clean the parts to remove any dust or debris. Skipping this step can result in poor fitting and unstable constructions. Use a soft cloth or brush to ensure that all parts are clean and ready for assembly.
3. Using Too Much Force: Zoids model kits are made of plastic, which can be delicate and prone to breakage if excessive force is applied. Avoid using excessive force when connecting the parts. Instead, apply gentle pressure and make sure the pieces fit together properly.
4. Neglecting to Trim Mold Lines: Mold lines are the remnants of the molding process and can be visible on the plastic parts of the Zoids model kits. Neglecting to trim these mold lines can affect the overall aesthetics of the finished model. Use a hobby knife or sandpaper to carefully remove these lines and achieve a smoother and cleaner look.
5. Ignoring the Importance of Dry-Fitting: Dry-fitting refers to temporarily fitting the parts together without adhesive. This step allows you to check the alignment and ensure that all the pieces fit properly before permanently assembling the model. Ignoring dry-fitting can lead to misalignments and difficulties in the later stages of the assembly.
6. Not Using a Proper Work Area: Creating a suitable work area is crucial when assembling Zoids model kits. Avoid working in dusty or cluttered spaces that can damage or misplace the delicate parts. Set up a clean and well-lit area where you can comfortably work on the model kit.
Webmasters Favourite Zoids
Shadow Fox:
Piloted by Brad Hunter, a mercenary who works for the Blitz Team. The Shadow Fox is a sleek and agile Zoid known for its stealth and speed. Its unique design and colour scheme make it a standout model kit for collectors.
Blade Liger:
The Blade Liger is an iconic Zoid recognized for its distinctive blade-like mane. With its impressive articulation and weaponry, it’s a favourite among Zoids enthusiasts.
Shield Liger:
The Shield Liger is a robust Zoid known for its defensive capabilities. Its imposing appearance and the shield on its back make it a formidable addition to any collection.
Command Wolf:
Piloted by fan favourite character Irvine the Command Wolf is a classic Zoid often associated with leadership roles in Zoids battles. Its modular design and posability make it a versatile and popular choice and it was devestating when the zoid was destroyed Raven’s Geno Breaker.
Dibison:
The Dibison is a heavy-duty Zoid resembling a bison, known for its raw power and durability. Collectors appreciate its unique design and the imposing presence it brings to their Zoids lineup. In the anime this thing was a monster and would hold its own against the Mighty Iron Kong.
Zoid Gallery